Arizona Home Search

Login : Register to Get Homes by Email

5 Ways to Protect Yourself When Buying a Fixer-Upper

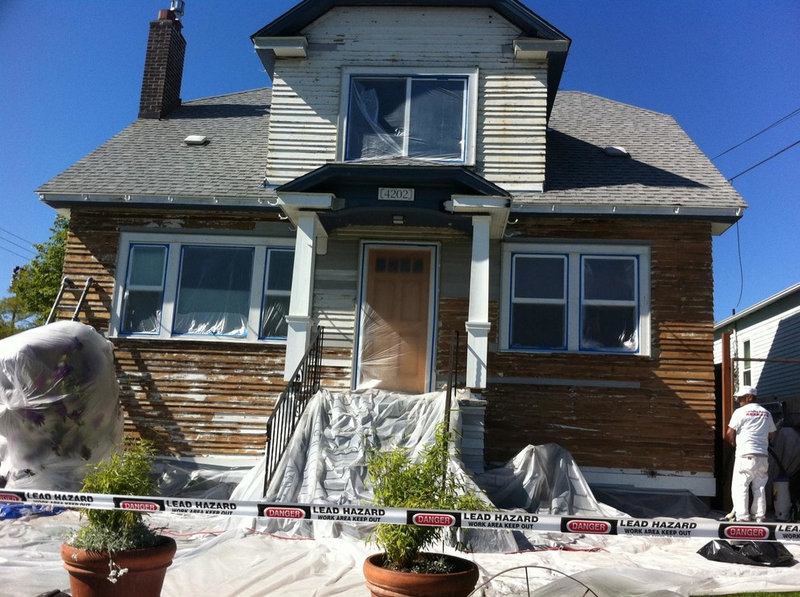
Hidden hazards can derail your dream of scoring a great deal. Before you plunk down any cash, sit down with this 

A fixer-upper can often seem like a first-time homebuyer’s dream: an older home with great bones that simply needs an update or perhaps a few tweaks to its layout.Unfortunately, even seemingly straightforward projects can be fraught with hidden problems discovered once work begins. While disclosure laws seek to protect homebuyers, sellers can always claim ignorance to problems like lead paint, and disclosures on distressed and bank-owned properties are nowhere near as complete as they are for traditional sales.But that doesn’t mean you have to risk getting stuck with a money pit. Here are five ways to project yourself when buying a fixer-upper.
1. Look out for lead paint. If you’re buying a home that was built before 1978, it may contain some lead paint. “You will often find lead in exterior siding; wood window frames and sills; old solid-core door frames, jambs and the doors themselves; and painted walls and ceilings in kitchens and bathrooms,” says Dan Ventura of Hawk Environmental Services.While it’s mandatory for sellers to disclose whether they have knowledge of any lead paint present in their house, they are required to do so only when they’ve specifically tested for it, and the law does not require that a test be performed.“Lead paint isn’t a hazard until it’s chipping, flaking or chalky,” Ventura says. Which is exactly what will happen if you disturb those surfaces during a remodel.Fortunately, you can easily look for clues that lead paint may have been used in the home. If the house was recently remodeled, lead paint dust may be present, so request a lead-dust-wipe analysis as a contingency of sale. During this noninvasive test, an inspector will swipe a section of floor with a special wipe and test the dust it gathers for lead.

Another option is to request an XRF test, in which the inspector uses a special tool to search for lead. “This allows us to test all the surfaces in the home and produce a spreadsheet report of exact lead content and locations,” says Ventura.

This option is much more expensive than the first, though, costing anywhere between $650 and $1,000 for an average residence, as opposed to just $100 for a swipe test.

Ventura also recommends walking the perimeter of the home to look for paint chips. If you see some, request that the soil be tested for lead, as well.

It’s also smart to request soil tests for areas where you might be considering a vegetable garden or a child’s play area. “Those areas have different thresholds for what’s accepted,” says Ventura.

2. Check for asbestos. “Asbestos may be present in any building material that is not wood, metal or glass,” says Ventura. While we often look for asbestos in materials like popcorn ceilings or vinyl tiles, it can often lurk in unexpected places, like specialty textures, appliance components and insulation.Ventura says one easy way to check for asbestos is to pull the metal caps from the heating registers and look inside. “Sometimes they’ll scrape the popcorn ceiling, and they won’t do it properly for asbestos,” says Ventura. “Guys that are doing a halfway job like that usually don’t cover up the registers, and you’ll find popcorn dust in the registers.”Be aware that asbestos is still legal for use in certain building materials, like some roof patches, but it’s much more likely to be present in homes built or remodeled before 1981.When you’re dealing with a house that predates that year, you might want to consider asbestos testing as a contingency, but you’ll need to get permission first, because testing is a destructive process that requires removing certain materials.

3. Hunt for mold. Notice a musty smell? Start looking for flood damage and mold. Telltale signs of water damage include wall stains and swollen baseboards. You should also look for signs of a cover-up.“I like to look for sections of baseboard and trim that don’t match the rest of the room, pull toe-kick registers in kitchen cabinetry and look under them, and pull drawers out of kitchen cabinetry and look at the Sheetrock in back of the drawer,” says Ventura. “I also look at baseboards and sheet vinyl flooring around bathtubs and showers to make sure there’s no staining, discoloration or inflammation, as well as any unusual patches in walls.”He also recommends checking trim flooring in and around any door leading to an outdoor space, and insisting that your home inspector get into every attic and crawl space to look for water damage there.If you still can’t find the source of the smell, Ventura says you might not have to worry. Older carpets and furnishings — especially in basements — tend to hold humidity in benign ways, thus creating that musty smell.

4. Check for broken bones. Look closely at the roof. Is it sagging? This is a sign of weakened or faulty roof material, or that the structure is simply too weak to support the weight of the roof, both of which are expensive problems to fix.Make sure the floors are level. Uneven floors can also be evidence of a structural problem or an issue with the soil the home is built on.You should also take a peek inside the electrical box. If it’s a mess, that’s a good indication that you’re going to have to do some rewiring.And if the home has ever been remodeled, make sure it’s properly ventilated. Ventura says he’s worked on many houses that had recently been flipped, and the flipper had tightened the building envelope without adding new heating or ventilation. As a result, the off-gassing from the new paint and carpeting made the new residents sick.

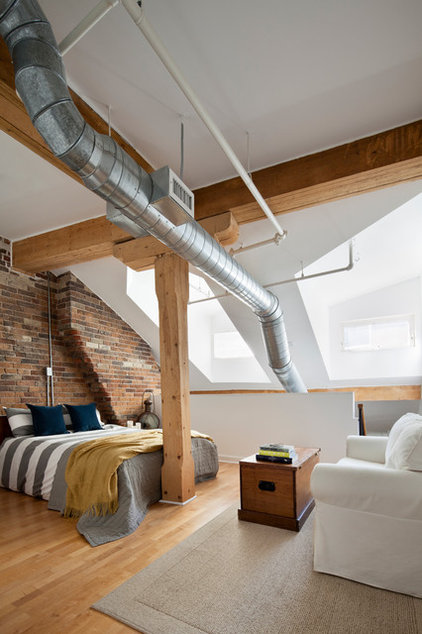
“Invariably, a lot of it leads back to ventilation,” he says.

5. Have a chat with the planning department. Bill Fry of Bill Fry Construction warns that skipping this simple step can cost many homeowners their dreams. For example, the water department may not allow you to add a bathroom. And then there’s the problem of additional square footage. “In many municipalities, adding on 500 square feet or more is a magic number where more requirements kick in, such as fire sprinklers, which need to be anticipated in your budget,” Fry says.He also cautions Californians that projects permitted after July 1, 2014, will be subject to more stringent CalGreen requirements.
Source: Houzz

Speak Your Mind

*

WP2Social Auto Publish Powered By : XYZScripts.com